Deploying Single Instance Neo4j On A VPS With Custom Domain
William Lyon
November 16, 2025
15 min read
Every so often I have a reason to deploy a Neo4j instance with a public read only user. Typically I'm using Neo4j Aura but for this deployment I'm going to use a virtual private server with a custom domain.
In this guide, we'll walk through deploying Neo4j Enterprise 5.x on any VPS—whether on Digital Ocean, AWS EC2, GCP Compute Engine, Azure Virtual Machines, or even on-premises infrastructure. The steps are universal and can be applied to any Linux-based server. We'll cover security features including setting up a custom domain with HTTPS encryption via Let's Encrypt, database restoration from backups, and proper user access controls.
While this guide uses Digital Ocean droplets as examples, the same steps apply to any cloud provider or on-premises VPS running Ubuntu or Debian.
Stay Updated
Get notified about new posts and videos
Overview#
When deploying Neo4j Enterprise in production, you need more than just getting the database running. You need secure connections, automated certificate management, backup restoration capabilities, and proper access controls. This guide covers all of these aspects for a single-instance deployment on any VPS.
We'll be using:
- Ubuntu 24 LTS or Debian 12 (adaptable to other distributions)
- Neo4j Enterprise 5.x (Debian package)
- Let's Encrypt for SSL/TLS certificates
- Nginx as a reverse proxy (optional)
- UFW firewall for security
Cloud Provider Flexibility#
These instructions work across all major cloud providers and on-premises infrastructure:
- Digital Ocean: Droplets
- AWS: EC2 instances
- GCP: Compute Engine instances
- Azure: Virtual Machines
- On-premises: Any VPS or bare metal server
The key requirement is a Linux-based system (Ubuntu/Debian preferred) with root access and a public IP address.
Prerequisites#
Before we begin, make sure you have:
- A cloud provider account (Digital Ocean, AWS, GCP, Azure) or access to on-premises infrastructure
- Neo4j Enterprise license key
- A domain name with DNS access
- Neo4j backup file (
.backupor dump file) - SSH key pair for secure access
- Basic familiarity with Linux command line and SSH
Create and Configure Your VPS#
Create the VPS#
Create a new VPS using your preferred cloud provider or on-premises infrastructure.
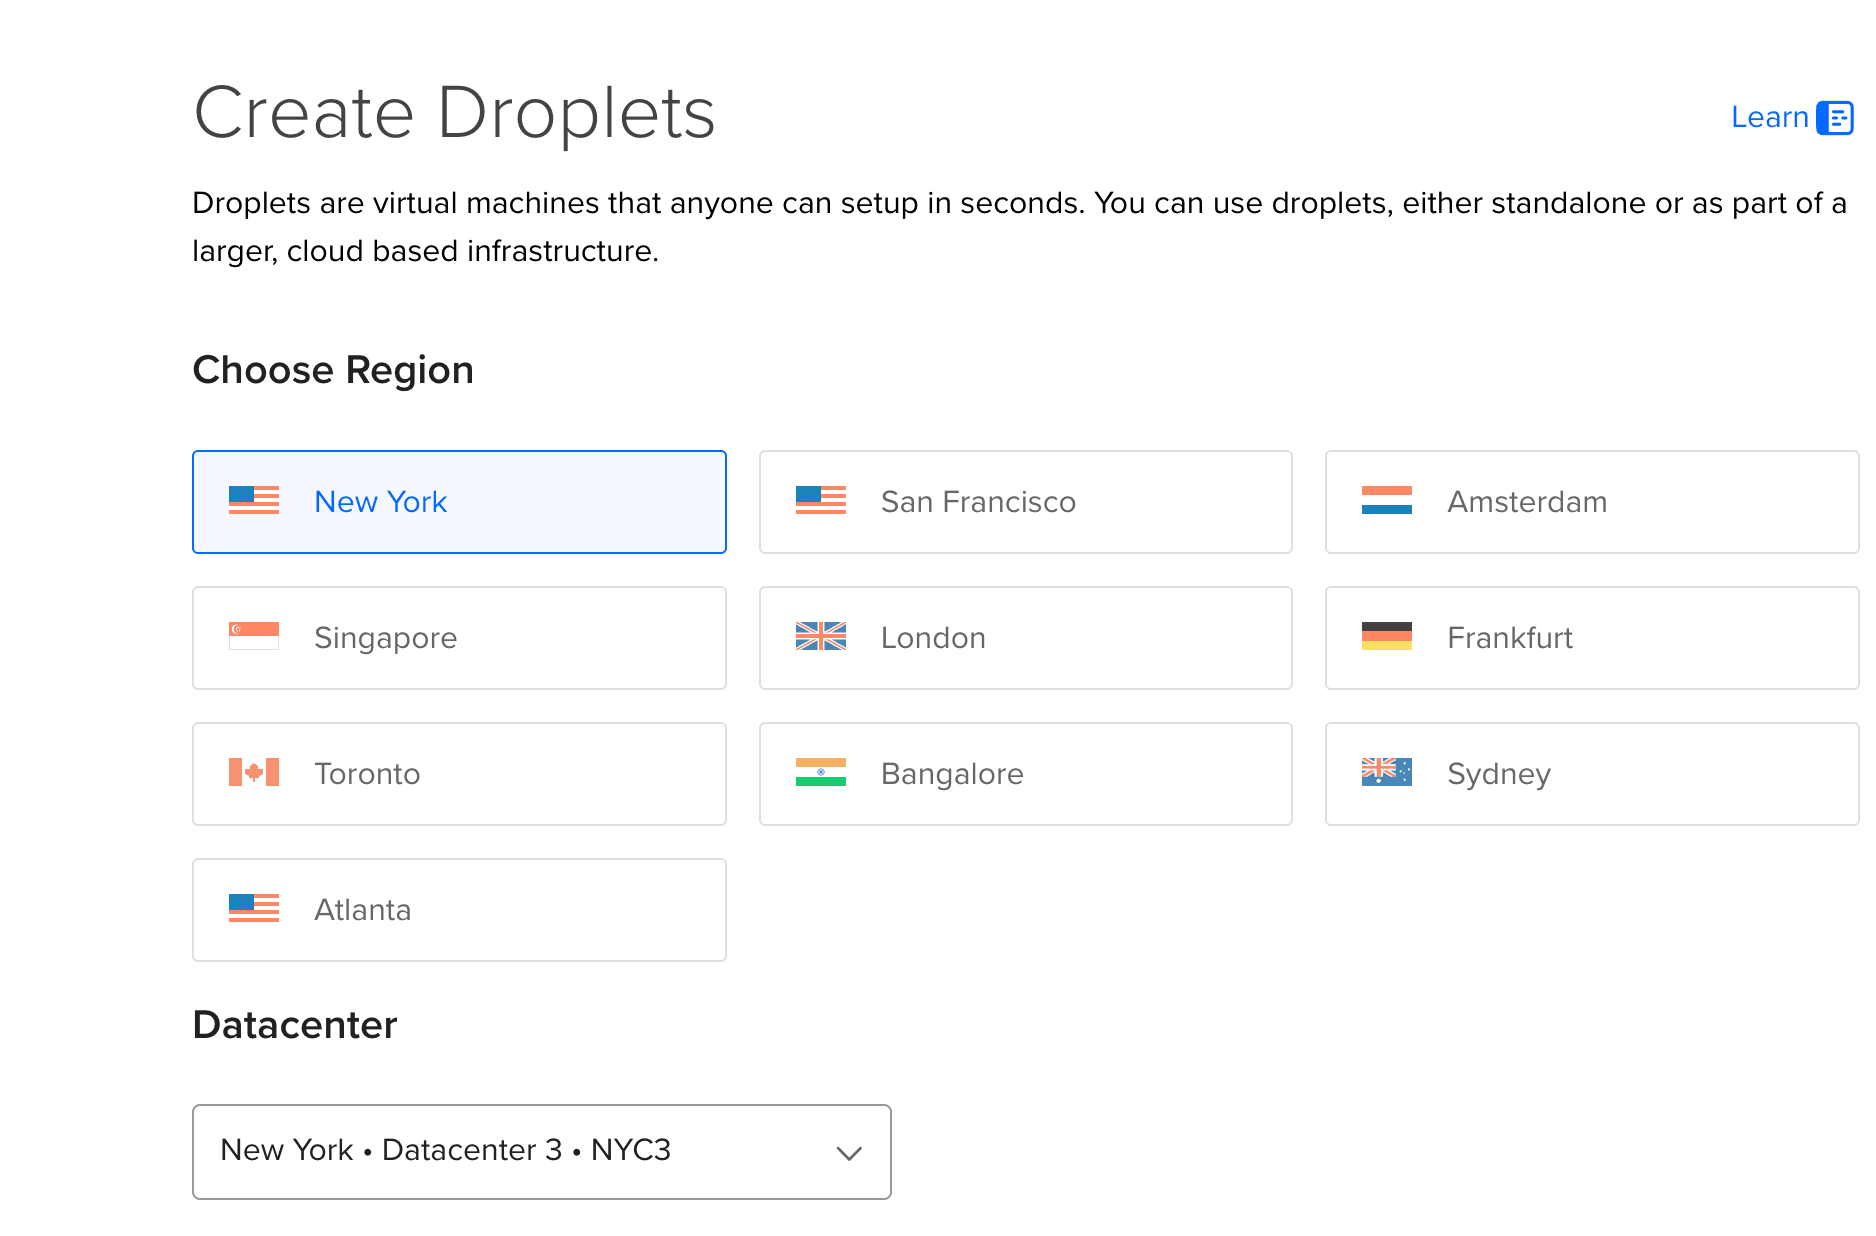
Digital Ocean Example:
- Click Create → Droplets
- Choose your configuration:
- Image: Ubuntu 24.04 LTS or Debian 12
- Plan: Minimum 4GB RAM, 2 vCPUs (adjust based on your needs)
- Datacenter: Choose region closest to your users
- Authentication: Select your SSH key
- Hostname: Something meaningful like
neo4j-prod
AWS EC2: Launch an Ubuntu 24.04 or Debian 12 instance with at least t3.medium (2 vCPU, 4GB RAM)
GCP Compute Engine: Create an e2-medium instance with Ubuntu 24.04 LTS
Azure Virtual Machines: Deploy a Standard B2s instance with Ubuntu Server 24.04 LTS
On-premises: Provision a VPS with Ubuntu 24.04 LTS or Debian 12 using your hypervisor of choice
Configure DNS#
Before we install Neo4j, set up your DNS records:
- Go to your domain registrar or DNS provider
- Add an A record:
- Type: A
- Name: Your subdomain (e.g.,
neo4jordb) - Value: Your VPS's public IP address
- TTL: 300 (5 minutes)
For example: neo4j.yourdomain.com → your.vps.ip.address
Initial Server Setup#
SSH into your VPS and perform initial setup:
ssh root@your.vps.ip.address

# Update system packages
apt update && apt upgrade -y

# Install basic utilities
apt install -y wget curl gnupg software-properties-common ufw
For better security, create a non-root user:
adduser neo4j
usermod -aG sudo neo4j
Note: If you're using AWS, GCP, or Azure, you may already have a default user (e.g., ubuntu, admin) instead of root. Adjust the SSH command accordingly.
Install Neo4j Enterprise#
We'll be using the Neo4j Debian package to install Neo4j Enterprise. See https://debian.neo4j.com/ for more about the Neo4j Debian package.
Install Java#
Neo4j 5.x requires Java 17 or 21:
apt install -y openjdk-17-jre-headless

# Verify installation
java -version
Add Neo4j Repository#
Import the Neo4j GPG key and add the repository:
# Import GPG key
wget -O - https://debian.neo4j.com/neotechnology.gpg.key | \
  gpg --dearmor -o /usr/share/keyrings/neo4j-archive-keyring.gpg

# Add repository
echo "deb [signed-by=/usr/share/keyrings/neo4j-archive-keyring.gpg] https://debian.neo4j.com stable latest" | \
  tee /etc/apt/sources.list.d/neo4j.list

# Update package list
apt update
Install Neo4j Enterprise#
List available versions:
apt-cache madison neo4j-enterprise
Install a specific 5.x version (e.g., 5.26.16):
apt install -y neo4j-enterprise=1:5.26.16

# Hold the package to prevent automatic updates
apt-mark hold neo4j-enterprise
Accept License#
Edit the Neo4j configuration to accept the commercial license:
nano /etc/neo4j/neo4j.conf
Add or uncomment these lines:
server.directories.data=/var/lib/neo4j/data
server.directories.logs=/var/lib/neo4j/logs
server.config.strict_validation.enabled=false
dbms.usage_report.enabled=false
Install APOC Plugin#
APOC (Awesome Procedures on Cypher) is one of the most popular Neo4j plugins, providing hundreds of utility procedures and functions for data conversion, graph algorithms, data integration, and more. It's highly recommended for production deployments.
Download APOC#
First, determine which version of APOC matches your Neo4j version. APOC versions correspond to Neo4j versions.
For Neo4j 5.26, download the corresponding APOC Core library:
# Create plugins directory if it doesn't exist
mkdir -p /var/lib/neo4j/plugins

# Download APOC Core for Neo4j 5.26
cd /var/lib/neo4j/plugins
wget https://github.com/neo4j/apoc/releases/download/5.26.0/apoc-5.26.0-core.jar
Note: Always match the APOC version to your Neo4j version. For Neo4j 5.x, use APOC 5.x. Check the APOC releases page for the exact version that matches your Neo4j installation.
Set Permissions#
Set proper ownership and permissions:
chown neo4j:neo4j /var/lib/neo4j/plugins/apoc-5.26.0-core.jar
chmod 644 /var/lib/neo4j/plugins/apoc-5.26.0-core.jar
Configure APOC Procedures#
Edit /etc/neo4j/neo4j.conf to enable APOC procedures:
nano /etc/neo4j/neo4j.conf
Add these configurations:
# Enable APOC procedures
dbms.security.procedures.unrestricted=apoc.*
dbms.security.procedures.allowlist=apoc.*

# Allow APOC to access external resources (optional - enable only if needed)
# apoc.import.file.enabled=true
# apoc.export.file.enabled=true
Security Note: The unrestricted setting allows APOC procedures to run without security restrictions. For production environments with strict security requirements, you may want to be more selective about which procedures to enable.
Verify Installation#
After Neo4j starts (we'll start it in the configuration section), you can verify APOC is installed by running:
cypher-shell -u neo4j -p YourSecurePassword123! "RETURN apoc.version() AS version;"
You can also list available APOC procedures:
cypher-shell -u neo4j -p YourSecurePassword123! "CALL apoc.help('apoc') YIELD name, description RETURN name, description LIMIT 10;"
Optional: Install APOC Extended#
APOC Extended includes additional procedures that may have external dependencies. Only install if you need the extended functionality:
cd /var/lib/neo4j/plugins
wget https://github.com/neo4j-contrib/neo4j-apoc-procedures/releases/download/5.26.0/apoc-5.26.0-extended.jar
chown neo4j:neo4j /var/lib/neo4j/plugins/apoc-5.26.0-extended.jar
chmod 644 /var/lib/neo4j/plugins/apoc-5.26.0-extended.jar
Configure Neo4j#
Basic Network Configuration#
Edit /etc/neo4j/neo4j.conf to configure network bindings:
nano /etc/neo4j/neo4j.conf
Configure the network connectors:
# Network connector configuration
server.default_listen_address=0.0.0.0

# HTTP Connector (we'll disable this after HTTPS is set up)
server.http.enabled=true
server.http.listen_address=:7474

# HTTPS Connector
server.https.enabled=true
server.https.listen_address=:7473

# Bolt connector
server.bolt.enabled=true
server.bolt.listen_address=:7687
server.bolt.tls_level=OPTIONAL
Set Initial Password#
Set the initial admin password using neo4j-admin:
neo4j-admin dbms set-initial-password 'YourSecurePassword123!'
Important: Replace with a strong password and store it securely.
Configure Memory#
Adjust memory settings based on your droplet size. Edit /etc/neo4j/neo4j.conf:
For a 4GB RAM droplet:
# Allocate 2GB to heap
server.memory.heap.initial_size=2g
server.memory.heap.max_size=2g

# Page cache (leave ~1GB for OS)
server.memory.pagecache.size=1g
For an 8GB droplet:
server.memory.heap.initial_size=4g
server.memory.heap.max_size=4g
server.memory.pagecache.size=3g
Set Up HTTPS with Let's Encrypt#
Install Certbot#
apt install -y certbot
Obtain SSL Certificate#
Make sure your DNS A record is properly configured and propagated, then obtain a certificate:
certbot certonly --standalone \
  -d neo4j.yourdomain.com \
  --preferred-challenges http \
  --agree-tos \
  -m your-email@example.com \
  --keep-until-expiring
This will place certificates in /etc/letsencrypt/live/neo4j.yourdomain.com/
Copy Certificates for Neo4j#
Neo4j 5.x uses PEM format certificates. Create the certificate directory:
mkdir -p /var/lib/neo4j/certificates/https
chown -R neo4j:neo4j /var/lib/neo4j/certificates
Copy the Let's Encrypt certificates as PEM files:
# Copy the certificate files
cp /etc/letsencrypt/live/neo4j.yourdomain.com/fullchain.pem \
   /var/lib/neo4j/certificates/https/public.crt

cp /etc/letsencrypt/live/neo4j.yourdomain.com/privkey.pem \
   /var/lib/neo4j/certificates/https/private.key
Set proper permissions:
chown neo4j:neo4j /var/lib/neo4j/certificates/https/public.crt
chown neo4j:neo4j /var/lib/neo4j/certificates/https/private.key
chmod 600 /var/lib/neo4j/certificates/https/private.key
chmod 644 /var/lib/neo4j/certificates/https/public.crt
Configure Neo4j to Use SSL Certificate#
Edit /etc/neo4j/neo4j.conf and add SSL configuration:
# HTTPS configuration
server.https.enabled=true
server.https.listen_address=:7473

# SSL certificate configuration for HTTPS
dbms.ssl.policy.https.enabled=true
dbms.ssl.policy.https.base_directory=/var/lib/neo4j/certificates/https
dbms.ssl.policy.https.private_key=private.key
dbms.ssl.policy.https.public_certificate=public.crt
dbms.ssl.policy.https.client_auth=NONE

# Bolt SSL configuration (optional but recommended)
dbms.ssl.policy.bolt.enabled=true
dbms.ssl.policy.bolt.base_directory=/var/lib/neo4j/certificates/https
dbms.ssl.policy.bolt.private_key=private.key
dbms.ssl.policy.bolt.public_certificate=public.crt
dbms.ssl.policy.bolt.client_auth=NONE
Set Up Certificate Auto-Renewal#
Create a renewal hook script for automatic certificate renewal:
nano /etc/letsencrypt/renewal-hooks/deploy/neo4j-cert-renewal.sh
Add the following content:
#!/bin/bash
DOMAIN="neo4j.yourdomain.com"

# Copy the renewed certificates
cp /etc/letsencrypt/live/$DOMAIN/fullchain.pem \
   /var/lib/neo4j/certificates/https/public.crt

cp /etc/letsencrypt/live/$DOMAIN/privkey.pem \
   /var/lib/neo4j/certificates/https/private.key

# Set permissions
chown neo4j:neo4j /var/lib/neo4j/certificates/https/public.crt
chown neo4j:neo4j /var/lib/neo4j/certificates/https/private.key
chmod 600 /var/lib/neo4j/certificates/https/private.key
chmod 644 /var/lib/neo4j/certificates/https/public.crt

# Restart Neo4j
systemctl restart neo4j
Make it executable and test:
chmod +x /etc/letsencrypt/renewal-hooks/deploy/neo4j-cert-renewal.sh

# Test renewal (dry run)
certbot renew --dry-run
Optional: Configure Nginx Reverse Proxy#
For cleaner URLs and better control, set up Nginx as a reverse proxy:
apt install -y nginx
Create the Nginx configuration:
nano /etc/nginx/sites-available/neo4j
Add this configuration:
server {
    listen 80;
    server_name neo4j.yourdomain.com;

    # Redirect HTTP to HTTPS
    return 301 https://$server_name$request_uri;
}

server {
    listen 443 ssl http2;
    server_name neo4j.yourdomain.com;

    ssl_certificate /etc/letsencrypt/live/neo4j.yourdomain.com/fullchain.pem;
    ssl_certificate_key /etc/letsencrypt/live/neo4j.yourdomain.com/privkey.pem;

    ssl_protocols TLSv1.2 TLSv1.3;
    ssl_ciphers HIGH:!aNULL:!MD5;

    location / {
        proxy_pass https://localhost:7473;
        proxy_set_header Host $host;
        proxy_set_header X-Real-IP $remote_addr;
        proxy_set_header X-Forwarded-For $proxy_add_x_forwarded_for;
        proxy_set_header X-Forwarded-Proto $scheme;
    }
}
Enable the site and restart Nginx:
ln -s /etc/nginx/sites-available/neo4j /etc/nginx/sites-enabled/
nginx -t
systemctl restart nginx
Transfer and Restore Database Backup#
Prepare for File Transfer#
Create a directory for backups:
mkdir -p /var/backups/neo4j
chown neo4j:neo4j /var/backups/neo4j
Transfer Backup File#
You have several options for transferring your backup file to the VPS.
Option A: Using SFTP Command Line
From your local machine:
sftp root@your.vps.ip.address
# Then in the SFTP session:
cd /var/backups/neo4j
put /path/to/your/local/backup-file.backup
quit
Option B: Using SCP
From your local machine:
scp /path/to/your/local/backup-file.backup \
  root@your.vps.ip.address:/var/backups/neo4j/
Option C: Using FileZilla or Cyberduck
- Open your SFTP client
- Connect to your VPS IP with SSH key authentication
- Navigate to
/var/backups/neo4j - Upload your backup file
Option D: Using Cloud Provider Tools
- AWS: Use
aws s3 cpto download from S3 directly to the EC2 instance - GCP: Use
gsutil cpto download from Cloud Storage - Azure: Use Azure CLI to download from Blob Storage
Set Permissions#
On the VPS, ensure proper permissions:
chown neo4j:neo4j /var/backups/neo4j/*
chmod 644 /var/backups/neo4j/*
Restore the Database#
Stop Neo4j before restoring:
systemctl stop neo4j
If you have a Neo4j backup file (.backup):
# Remove existing default database if present
rm -rf /var/lib/neo4j/data/databases/neo4j
rm -rf /var/lib/neo4j/data/transactions/neo4j

# Restore the backup
neo4j-admin database restore neo4j \
  --from-path=/var/backups/neo4j \
  --overwrite-destination=true
If you have a dump file:
# Load the dump
neo4j-admin database load neo4j \
  --from-path=/var/backups/neo4j \
  --overwrite-destination=true
Set proper permissions and start Neo4j:
chown -R neo4j:neo4j /var/lib/neo4j/data
systemctl start neo4j

# Check status
systemctl status neo4j

# Monitor logs
tail -f /var/lib/neo4j/logs/neo4j.log
Create Read-Only User#
After restoring your database, you'll likely want to create users with appropriate access levels. Let's create a read-only user for querying data.
Connect to Neo4j#
Using cypher-shell:
cypher-shell -a bolt://localhost:7687 -u neo4j -p YourSecurePassword123!
Create Read-Only Role#
Create a custom role with read-only permissions:
// Create a read-only role
CREATE ROLE reader IF NOT EXISTS;

// Grant read privileges on the database
GRANT ACCESS ON DATABASE neo4j TO reader;
GRANT MATCH {*} ON GRAPH neo4j TO reader;
GRANT READ {*} ON GRAPH neo4j TO reader;

// Grant TRAVERSE to traverse relationships
GRANT TRAVERSE ON GRAPH neo4j TO reader;

// Allow executing specific procedures
GRANT EXECUTE PROCEDURE db.labels ON DBMS TO reader;
GRANT EXECUTE PROCEDURE db.relationshipTypes ON DBMS TO reader;
GRANT EXECUTE PROCEDURE db.propertyKeys ON DBMS TO reader;
GRANT EXECUTE PROCEDURE db.schema.* ON DBMS TO reader;

// Grant access to APOC procedures (if installed)
GRANT EXECUTE PROCEDURE apoc.* ON DBMS TO reader;
GRANT EXECUTE FUNCTION apoc.* ON DBMS TO reader;
Create Read-Only User#
Create a user and assign the reader role:
// Create the user
CREATE USER readonly
SET PASSWORD 'SecureReadOnlyPassword456!'
CHANGE NOT REQUIRED;

// Assign the reader role
GRANT ROLE reader TO readonly;

// Verify the user was created
SHOW USERS;
Verify Read-Only Permissions#
Exit cypher-shell (type :exit) and reconnect as the read-only user:
cypher-shell -a bolt://localhost:7687 -u readonly -p SecureReadOnlyPassword456!
Test read access:
// This should work
MATCH (n) RETURN count(n) LIMIT 1;

// Test APOC access (if installed)
RETURN apoc.version() AS version;

// This should fail with a permission error
CREATE (n:Test {name: 'test'});
You should see an error message indicating that write operations are not allowed.
Advanced: Label-Specific Access#
For more granular control, you can restrict access to specific labels:
// Create a role with limited access
CREATE ROLE limited_reader IF NOT EXISTS;
GRANT ACCESS ON DATABASE neo4j TO limited_reader;
GRANT MATCH {Person, Product} ON GRAPH neo4j TO limited_reader;
GRANT READ {*} ON GRAPH neo4j NODES Person, Product TO limited_reader;

// Create a user with limited access
CREATE USER limited_readonly
SET PASSWORD 'AnotherSecurePassword!'
CHANGE NOT REQUIRED;

GRANT ROLE limited_reader TO limited_readonly;
Verify and Test#
We should now have a publicly accessible Neo4j instance with a custom domain, HTTPS encryption, and a read-only user.
Test Local Access#
From the VPS, test that Neo4j is responding:
curl -v http://localhost:7474
curl -v https://localhost:7473
Test Remote HTTPS Access#
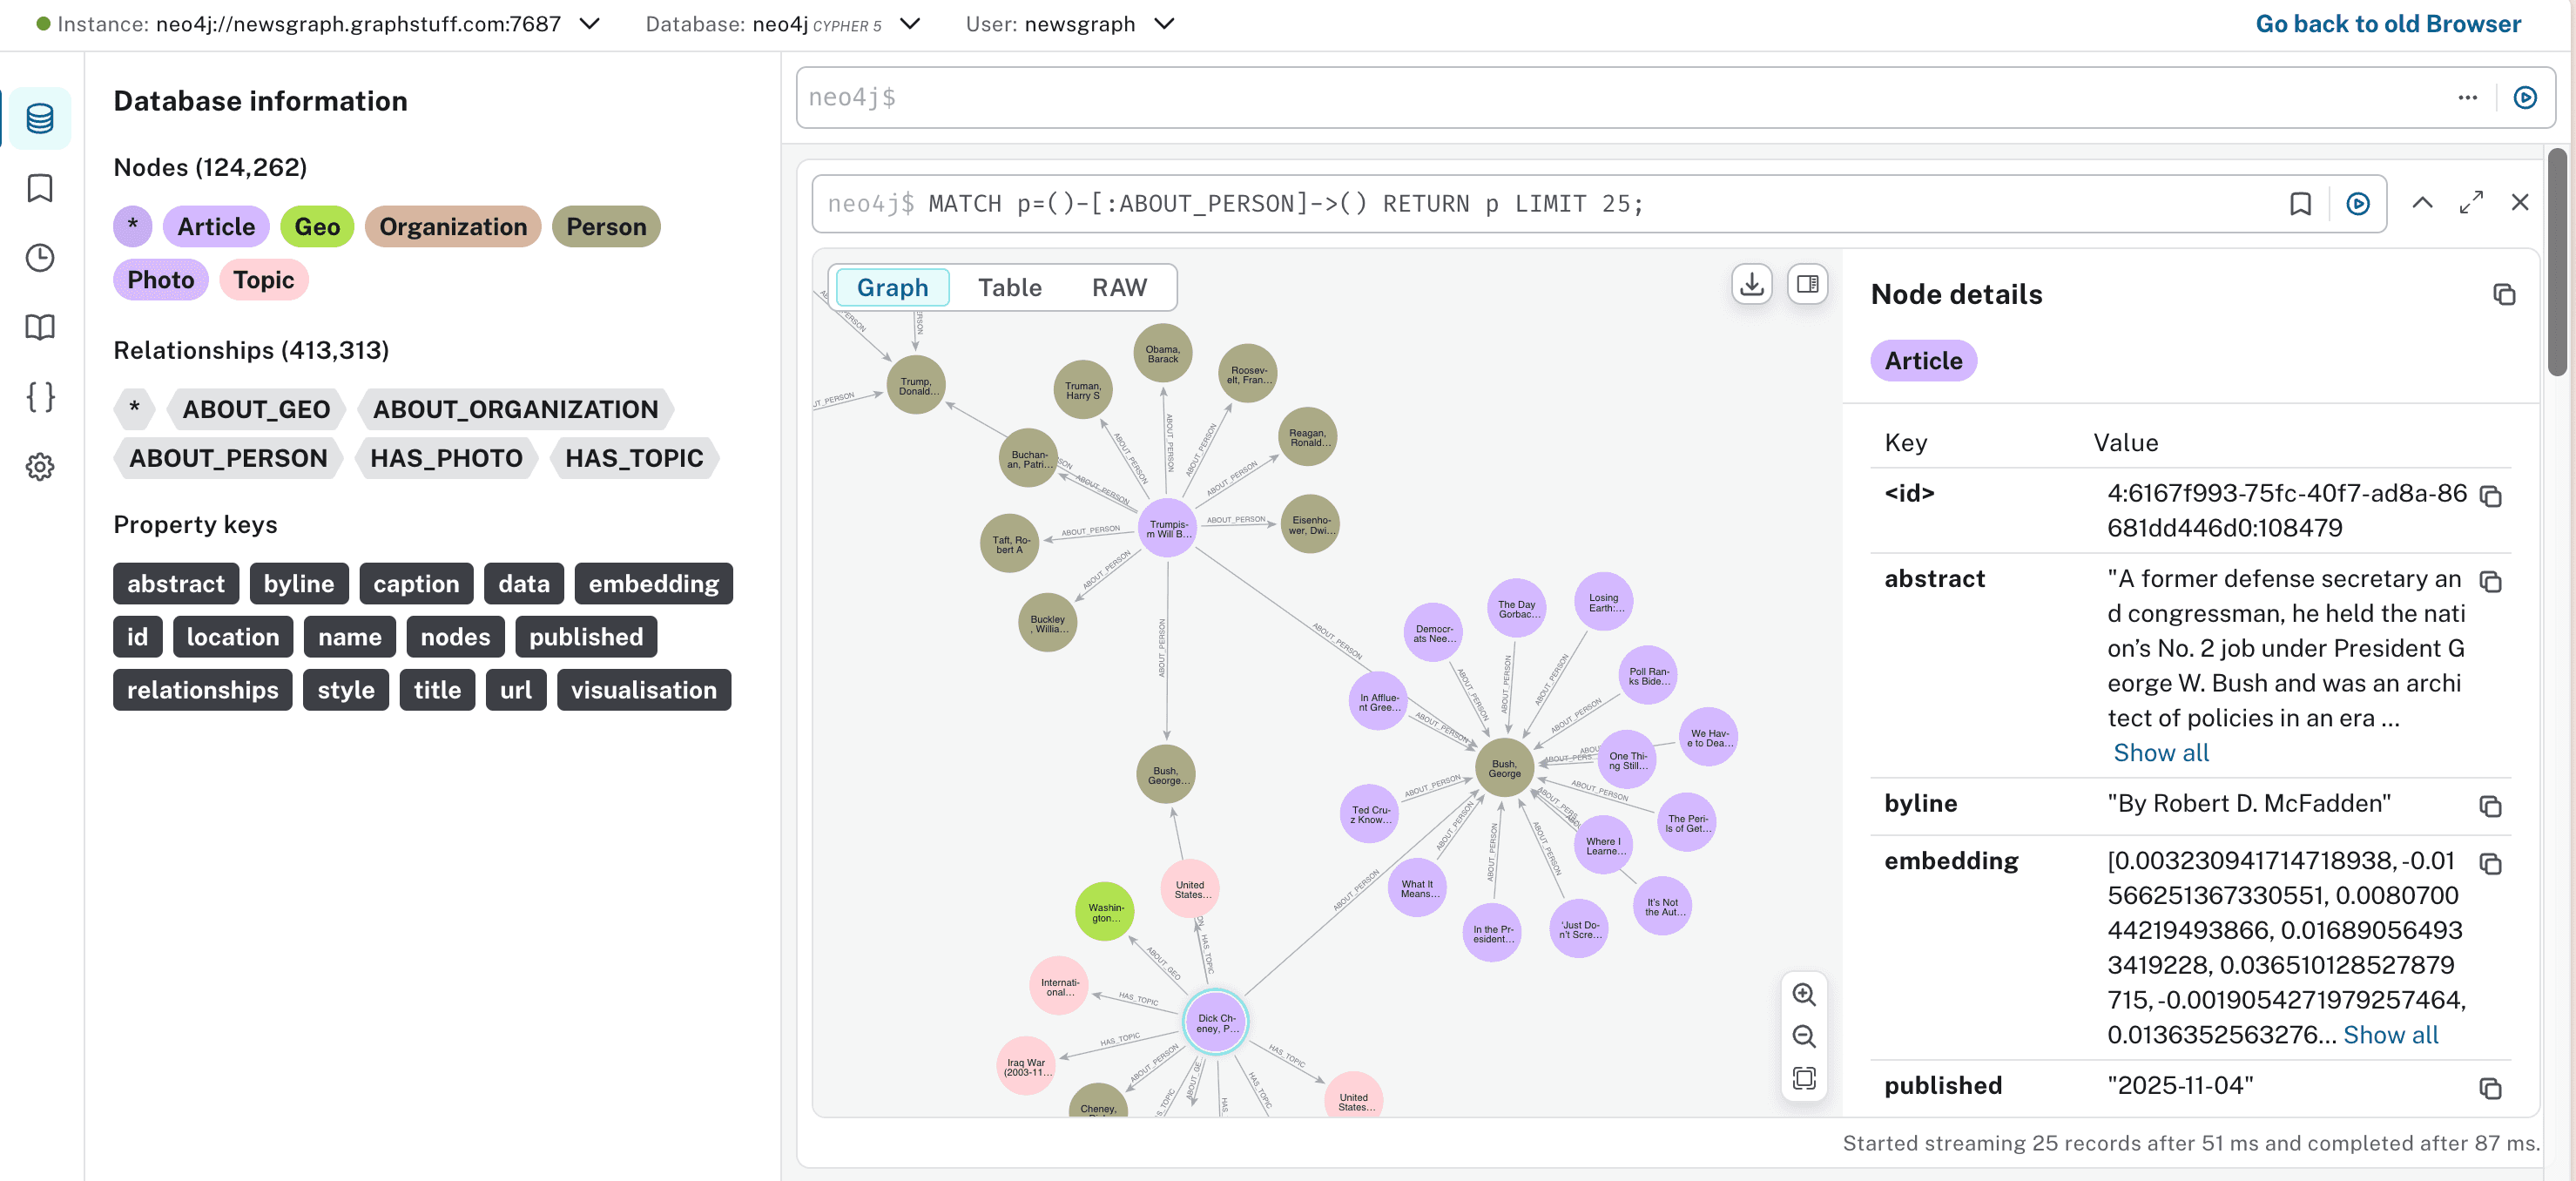
From your local machine, open a browser and navigate to:
https://neo4j.yourdomain.com:7473
Or if using Nginx reverse proxy:
https://neo4j.yourdomain.com
You should see the Neo4j Browser interface.
Test Bolt Connection#
Test the Bolt connection from the server:
cypher-shell -a bolt://localhost:7687 -u neo4j -p YourSecurePassword123!
Run a test query:
MATCH (n) RETURN count(n) as nodeCount;
Test from Local Machine#
Using Neo4j Desktop or cypher-shell from your local machine:
cypher-shell -a bolt+s://neo4j.yourdomain.com:7687 \
  -u neo4j -p YourSecurePassword123!
Test Read-Only User#
Verify that the read-only user works correctly:
cypher-shell -a bolt+s://neo4j.yourdomain.com:7687 \
  -u readonly -p SecureReadOnlyPassword456!
Test permissions:
// Should work
MATCH (n) RETURN count(n) LIMIT 1;

// Should fail
CREATE (n:Test);
Security Hardening#
Configure Firewall#
Set up UFW firewall to restrict access:
# Allow SSH
ufw allow 22/tcp

# Allow HTTPS only (if using Nginx)
ufw allow 443/tcp

# OR allow Neo4j HTTPS and Bolt directly
ufw allow 7473/tcp
ufw allow 7687/tcp

# Enable firewall
ufw --force enable
ufw status
Disable HTTP Access#
Once HTTPS is working, disable HTTP by editing /etc/neo4j/neo4j.conf:
server.http.enabled=false
Then restart Neo4j:
systemctl restart neo4j
Enable Neo4j Service#
Ensure Neo4j starts on boot:
systemctl enable neo4j
Set Up Monitoring#
Check the Neo4j metrics endpoint:
curl http://localhost:7474/metrics
Consider setting up:
- Log rotation (already configured by default in
/etc/logrotate.d/neo4j) - Monitoring with Prometheus + Grafana
- Automated backups
Regular Backups#
Create an automated backup script:
nano /usr/local/bin/neo4j-backup.sh
Add this content:
#!/bin/bash
DATE=$(date +%Y%m%d_%H%M%S)
BACKUP_DIR="/var/backups/neo4j"

# Create backup
neo4j-admin database backup neo4j \
  --to-path=$BACKUP_DIR/backup-$DATE \
  --verbose

# Keep only last 7 backups
ls -t $BACKUP_DIR/backup-* | tail -n +8 | xargs rm -rf

# Optional: Upload to object storage
# aws s3 sync $BACKUP_DIR s3://your-bucket/neo4j-backups/
Make it executable:
chmod +x /usr/local/bin/neo4j-backup.sh
Set up a cron job for daily backups at 2 AM:
crontab -e
Add this line:
0 2 * * * /usr/local/bin/neo4j-backup.sh >> /var/log/neo4j-backup.log 2>&1
Troubleshooting#
Neo4j Won't Start#
Check the logs:
journalctl -u neo4j -n 50
tail -f /var/lib/neo4j/logs/neo4j.log
Common issues:
- Insufficient memory: Adjust heap settings in
neo4j.conf - Port conflicts: Check if ports are already in use with
netstat -tlnp | grep java - Permission issues: Ensure proper ownership with
chown -R neo4j:neo4j /var/lib/neo4j
SSL Certificate Issues#
Verify the certificates exist and have correct permissions:
ls -la /var/lib/neo4j/certificates/https/
You should see private.key and public.crt files owned by neo4j:neo4j.
Test the SSL endpoint:
openssl s_client -connect localhost:7473
Connection Refused#
Check the firewall:
ufw status
Verify Neo4j is listening on the expected ports:
netstat -tlnp | grep java
Database Restore Failed#
Check disk space:
df -h
Verify backup file integrity:
ls -lh /var/backups/neo4j/
Quick Reference#
Service Management#
# Start Neo4j
systemctl start neo4j

# Stop Neo4j
systemctl stop neo4j

# Restart Neo4j
systemctl restart neo4j

# Check status
systemctl status neo4j

# View logs
journalctl -u neo4j -f
tail -f /var/lib/neo4j/logs/neo4j.log
Important Paths#
- Configuration:
/etc/neo4j/neo4j.conf - Data:
/var/lib/neo4j/data - Logs:
/var/lib/neo4j/logs - Certificates:
/var/lib/neo4j/certificates - Backups:
/var/backups/neo4j
Default Ports#
- HTTP: 7474 (disable after HTTPS setup)
- HTTPS: 7473
- Bolt: 7687
Next Steps#
Now that you have a secure Neo4j Enterprise deployment running on your VPS, consider these next steps:
- Set up monitoring: Integrate with Prometheus and Grafana for comprehensive monitoring
- Configure automated backups: Schedule regular backups to object storage (S3, GCS, Azure Blob, DigitalOcean Spaces)
- Optimize performance: Tune memory settings and query performance based on your workload
- Review security: Conduct regular security audits and keep Neo4j updated
- Set up alerts: Monitor disk space, memory usage, and database health with alerting
- Automate with IaC: Convert your manual steps to Terraform and Ansible for reproducible deployments
Resources#
Neo4j Documentation#
Cloud Provider Guides#
Infrastructure as Code#
- Neo4j Terraform Modules for GCP
- Causal Cluster Deployment Using Terraform - Community discussion on Neo4j cluster deployment with Terraform
- Cloud Infrastructure Automation with Terraform and Ansible - IaC best practices
- Terraform and Ansible: Infrastructure and Deployments - Combining Terraform and Ansible effectively
Security#
Stay Updated
Get notified about new posts and videos